👽️ What are Netlify Serverless Functions and how to use them?

I am a full stack developer, YouTuber and blogger!
👋 Welcome back!
So I recently looked into Serverless functions or Lambda functions and I learned them.
They can be extremely useful when building an app that is fully front-end and there are chances to expose API keys and so on.
So today we'll be learning what exactly are serverless functions and how could we use them with Netlify.
❓ What are serverless functions?

In simple words, serverless functions are a replacement to a custom node.js server. If you are familiar with Node.js and creating APIs using Node, serverless functions are easy to understand.
A Node.js server and serverless functions are exactly the same but the biggest difference between them is,
- Node.js servers require you to manage the server
- Serverless functions are handled by another provider
🪜 Example
If you have a website that runs at coolsite.com and is delivered by a CDN service like Netlify, your serverless functions might be running at coolsite.com/api/....
Whilst if you have a custom Node.js server, you have to deploy it somewhere else to keep it running like on Heroku.
🏗️ Using Netlify Serverless functions

Say you have a static HTML, CSS, and JS website, and you want to use serverless functions on that site. In simple words, you want to create an API that runs backend code.
Like fetching data from an external API, making database queries, etc...
The first thing you will need to do is install netlify-cli globally on your machine. You can do that by running:
npm i -g netlify-cli
After doing that, in your project folder, create a netlify.toml file with this content, this specifies the path of the folder where you want your functions to be
[build]
    functions = "functions"
Then run this command in the terminal, and it will ask you a few questions.
netlify functions:create
You can make your choice as per your preference, we'll choose JavaScript and hello-world
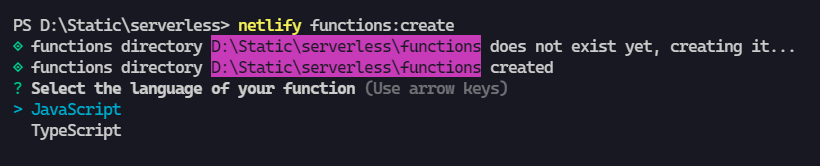

After you have entered the name of your function in the prompt, you will see a folder inside the functions folder for your Serverless Function.
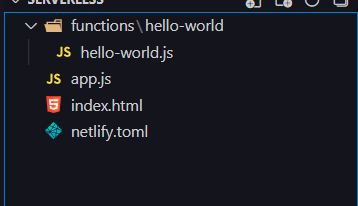
Now that file simply exports a function, and that function returns the response, just like in a Node.js server.
For this demo, I simplified the file and made the function return some dummy data, here's how the file looks like:
const handler = async event => {
  return {
    statusCode: 200,
    body: 'Hello, World!',
  };
};

module.exports = { handler };
Here, the parameter called event is an object with the following properties:
{
    path: "Path parameter",
    httpMethod: "Incoming request’s method name",
    headers: {Incoming request headers},
    queryStringParameters: {Query string parameters},
    body: "A JSON string of the request payload",
    isBase64Encoded: "A boolean flag to indicate if the applicable request payload is Base64-encoded"
}
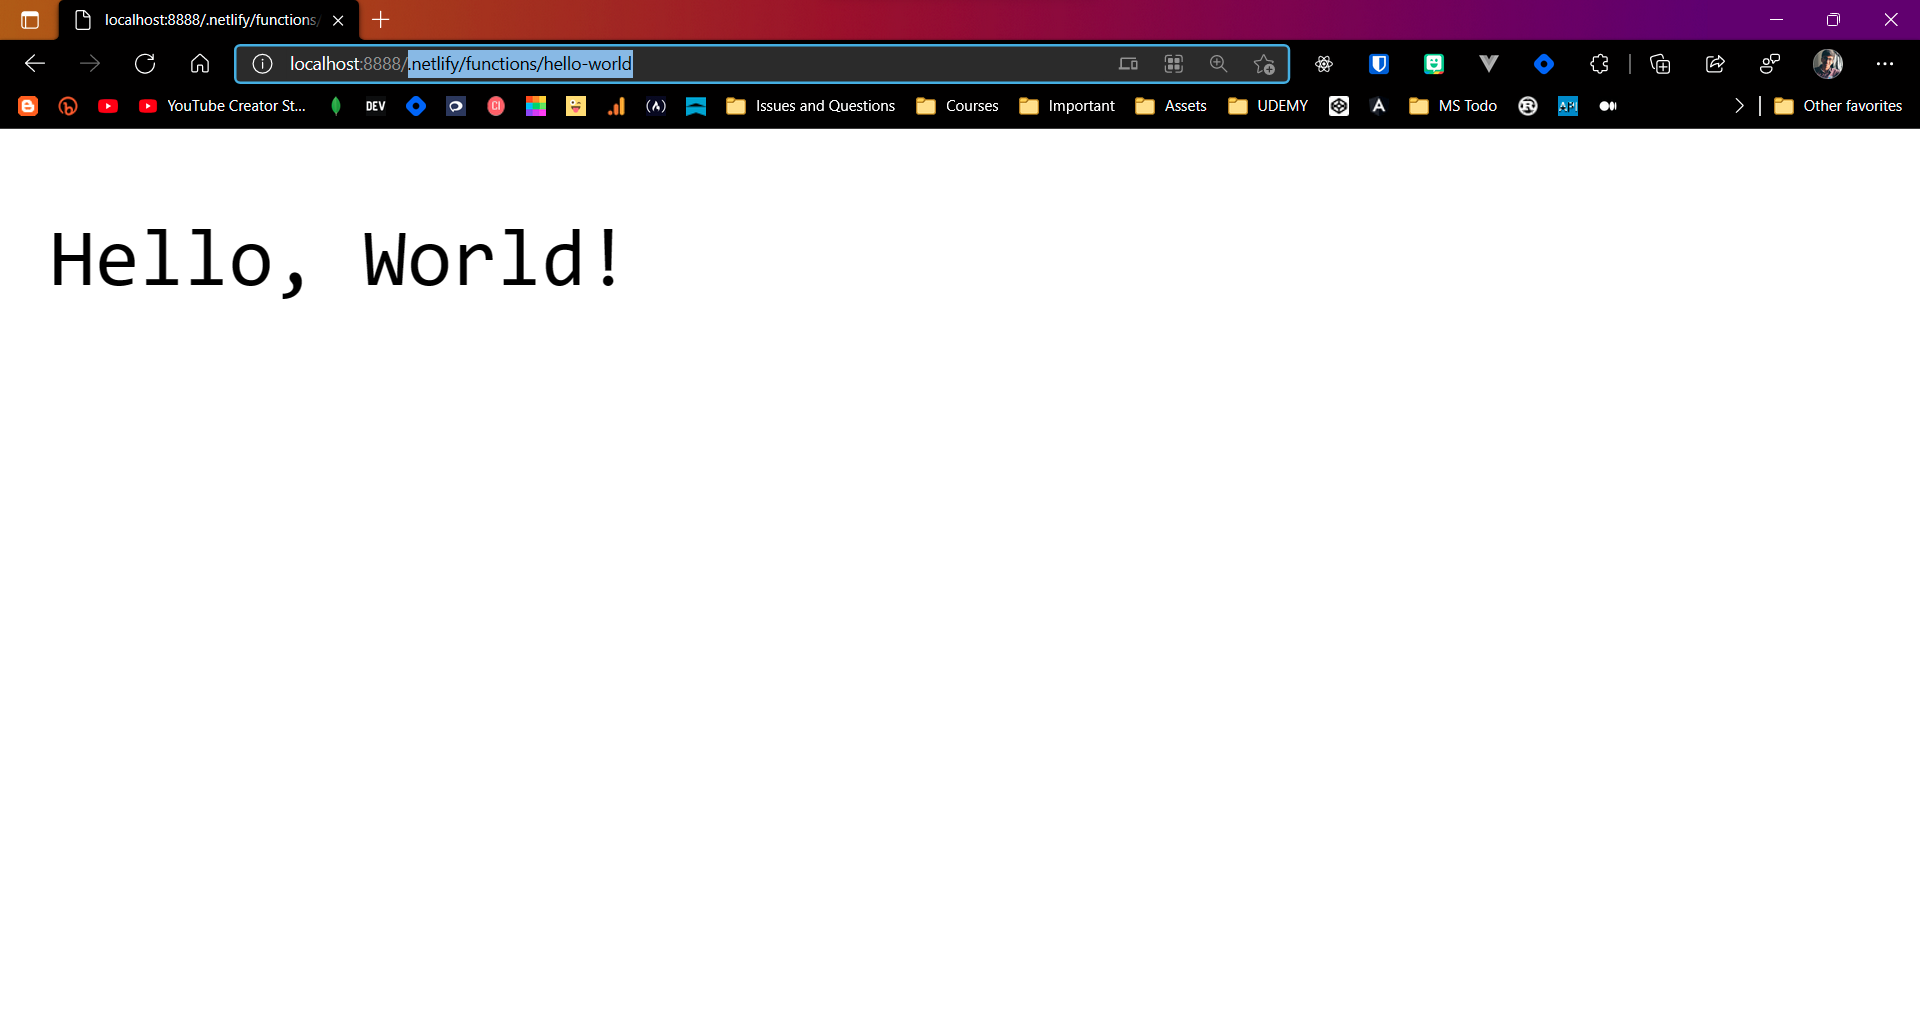
To see the function in action, you can run the command netlify dev, it'll start a dev server with hot reload on port 8888, and follow these steps to see how you can use it.
netlify dev
On localhost:8888, append this part: /.netlify/functions/[FUNCTION_NAME]. So the URL should look like this: http://localhost:8888/.netlify/functions/hello-world
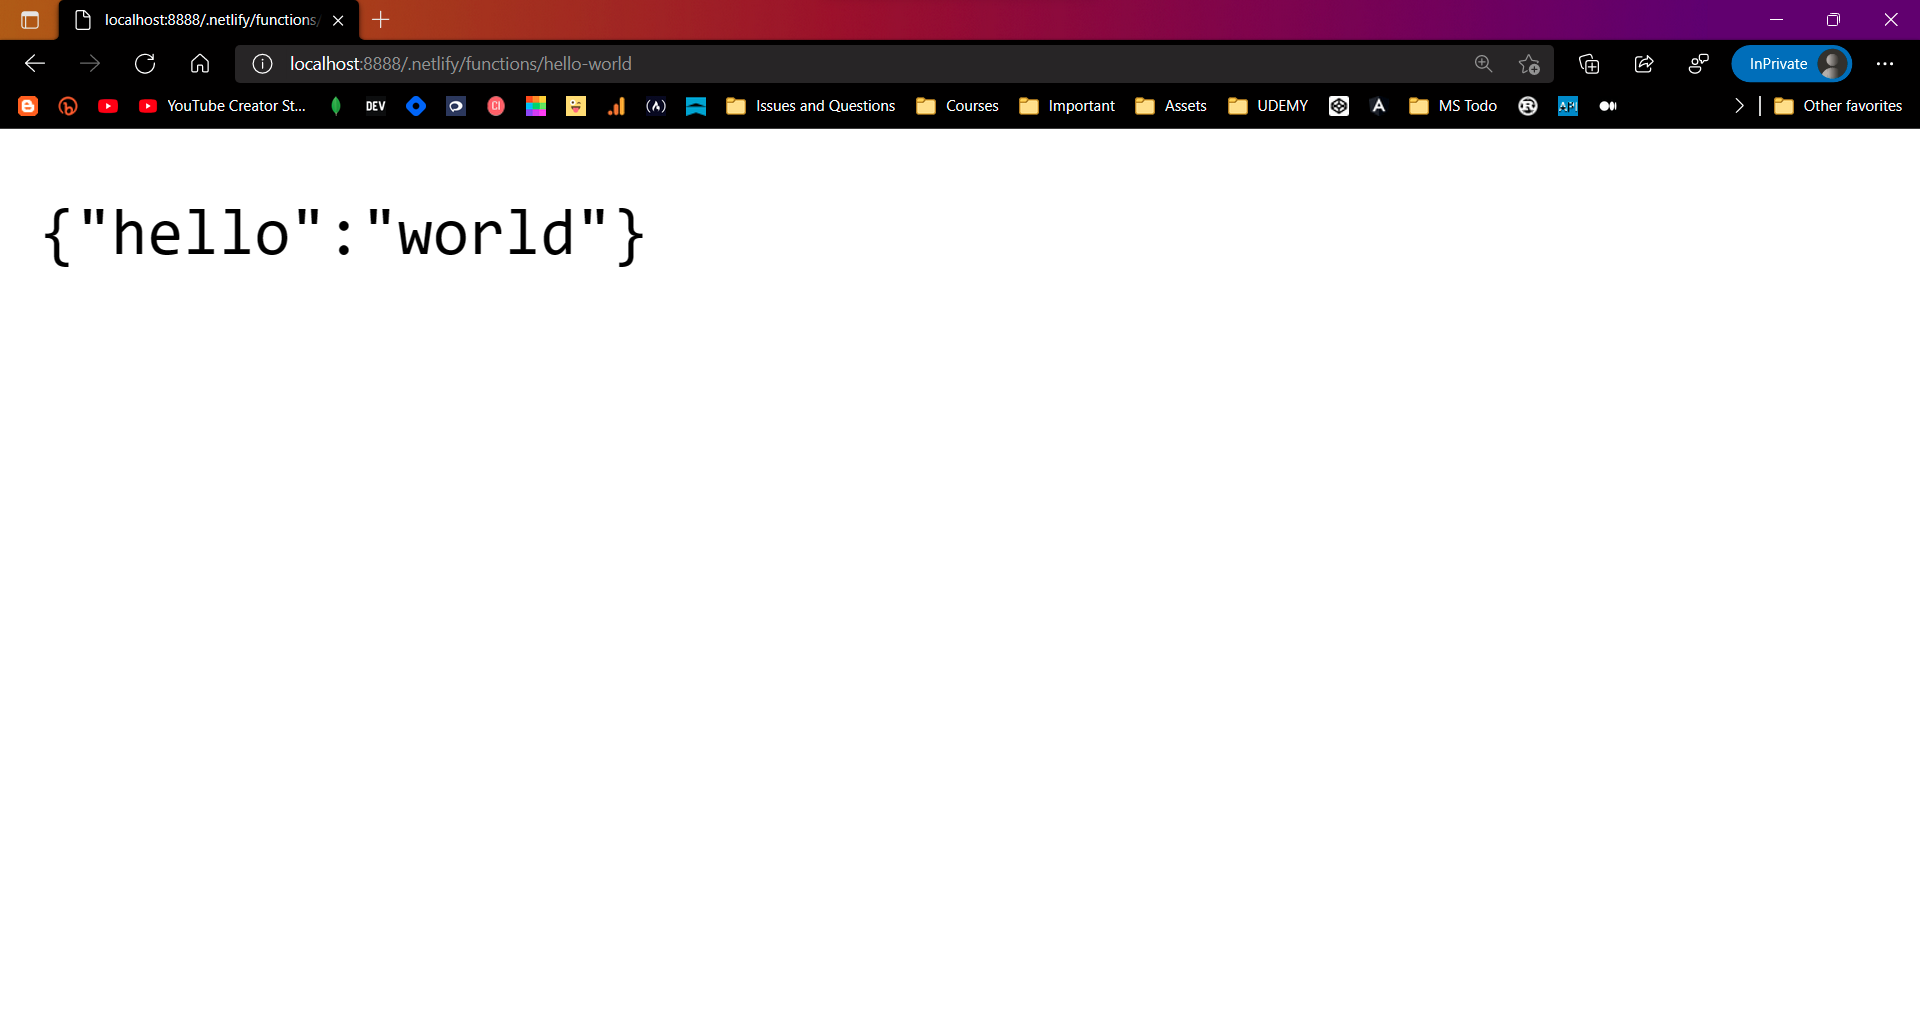
If I changed the response from normal text to this:
return {
  statusCode: 200,
  body: JSON.stringify({
    hello: 'world',
  }),
};
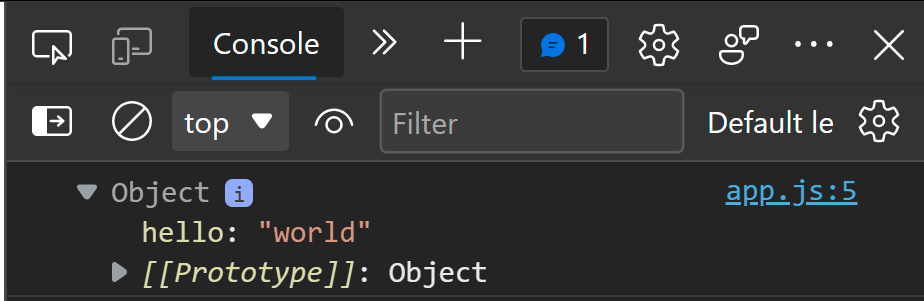
The result will be this:
Similarly, you can write any valid Node.js code in the function file, and that will work as your back-end code.
♻️ Using /api/* endpoint
Now a lot of you might not be liking the endpoint /.netlify/functions/*, so to convert that endpoint to a simpler one, we can edit the netlify.toml file with this config:
[build]
    functions = "functions"
# Add from here
[[redirects]]
    from = "api/*"
    to= ".netlify/functions/:splat"
    status = 200
Now if you were to visit http://localhost:8888/api/hello-world, it will give you the same output!
🏋️♂️ Fetching the data from the front-end
Now that we have our function created, we can easily fetch the data from our frontend JavaScript.
function fetchData() {
  fetch('/api/hello-world')
    .then(res => res.json())
    .then(data => {
      console.log(data);
    });
}

fetchData();
And now when you check it on localhost:8888, in the console, we get the response successfully.
Read more on the documentation: https://docs.netlify.com/functions/build-with-javascript/
Thanks for reading!
I hope you liked it! Comment down your thoughts! There is always room for improvement so let me know your suggestions!
Connect with me on my YouTube channel and my Twitter 😉
Until next time, keeping awesome ✌️!


