💫 How to add routing loader using nprogress in Next.js?

I am a full stack developer, YouTuber and blogger!
Hey everyone 👋!
So Next.js has been very popular nowadays and I am completely switching from the good old React to the Next.js because it's of course better.
With the awesome routing system in Next.js, there are a ton of advantages like events and all that which are very useful when you dig into them.
Today, using the router in Next.js, I'll show you how you can create a page loader that shows a progress bar while we are navigating to a different page. It'll enhance the user experience on your site.
And the process is absolutely simple. Just a few lines of code as always. We'll use an NPM package called nprogress
✨ Result
1. Create a Next.js app
npx create-next-app nprogress-demo
2. Install nprogress
You can use npm, yarn or pnpm to do this, just install nprogress
npm i nprogress

# If you're using TypeScript, install this too
npm i -D @types/nprogress
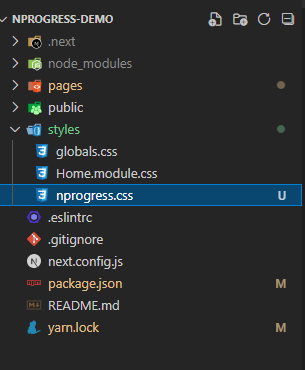
3. Get the nprogress.css file
The nprogress package ships with a CSS file which it needs but you have to import it in the _app.js file, so you can create a nprogress.css file in your styles folder and copy and paste styles from this CDN
After saving the file, you can edit anything you want in that one, I made some changes which fit my needs are as follows:
I changed every background colour from #29d to #0070f3 and you can change it to any other colour you want
/* I made these changes in nprogress.css */
#nprogress .bar {
  height: 3px;
}
#nprogress .spinner-icon {
  width: 25px;
  height: 25px;
  border: solid 3px transparent;
}
And finally, you can import the CSS file in the _app.js file
// _app.js
import "../styles/nprogress.css";
4. Add a new page (for the demo)
I simply created a second.js file in the pages folder with these contents. It uses getServerSideProps where we fetch some data on request of the page, so that we get a slight delay while navigating
// second.js
import Head from "next/head";
import Image from "next/image";
import Link from "next/link";
import styles from "../styles/Home.module.css";
export default function SecondPage({ data }) {
return (
<div className={styles.container}>
<Head>
<title>Second page</title>
<link rel="icon" href="/favicon.ico" />
</Head>
<main className={styles.main}>
<h1 className={styles.title}>Second page</h1>
<p className={styles.description}>
This is the second page. Go to{" "}
<Link href="/">
<a>Home</a>
</Link>
</p>
<div className={styles.grid}>
{data.map(user => (
<div className={styles.card} key={user.id}>
<h2>{user.name} →</h2>
<p>Works in {user.company.name}</p>
</div>
))}
</div>
</main>
</div>
);
}
export const getServerSideProps = async () => {
const res = await fetch("https://jsonplaceholder.typicode.com/users");
const data = await res.json();
return {
props: {
data: data.slice(0, 4),
},
};
};
5. Use Router events to show the progress bar
To show the progress bar, we use the Next.js Router's events. You can do all the logic inside the _app.js file.
// _app.js
import Router from "next/router";
import nProgress from "nprogress";
import "../styles/globals.css";
import "../styles/nprogress.css";

Router.events.on("routeChangeStart", nProgress.start);
Router.events.on("routeChangeError", nProgress.done);
Router.events.on("routeChangeComplete", nProgress.done);

function MyApp({ Component, pageProps }) {
  return <Component {...pageProps} />;
}

export default MyApp;
When the routeChangeStart event fires, we start the progress bar by using nProgress.start function.
Don't invoke the function like
nProgress.start(), pass it without the parenthesis because there should be a callback function in the events.
And when the other two events routeChangeError, routeChangeComplete occur, we simply pass in nProgress.done which completes the progress bar.
And that's it 🥳 !
In these 5 simple steps, we managed to add a progress bar while navigating to different pages in Next.js. Let me know all your questions in the comments and share this knowledge to others to help them.
Finally, you can check me out on YouTube, Twitter, etc. Thanks for reading!


