# 😱 Make a Random Meme API With Node.js and Puppeteer

# 👋 Hello there

Today's article is all about how you can make a **Random Meme** API using Node.js and web scraping. We'll be using [Fastify](https://www.fastify.io/) for our API and we'll be using [Puppeteer](https://github.com/puppeteer/puppeteer) to scrape the web and get the random meme.

This random meme API was inspired by the same kind of API [here](https://github.com/techytushar/random-memer). But I wanted to build it using Node.js and Puppeteer.

We'll be scraping [Memedroid](http://memedroid.com/) using the  [Puppeteer NPM package](http://npmjs.org/package/puppeteer).

## Initializing the project

First of all, we'll need to create a folder with the name we want and we'll need to initialize our Node.js app in that folder. We do it using this command:

```bash
npm init -y
```

Then we need two dependencies to install, simply install `puppeteer` and `fastify`.

```bash
npm i puppeteer fastify
```

## Using Fastify for API

After we have our project set up and our dependencies installed, we're good to go with writing the code! Create an `index.js` file and import `fastify` with this code to create the server.

```js
const fastify = require('fastify')({ logger: true });

const start = async () => {
  try {
    await fastify.listen(5555);
  } catch (err) {
    fastify.log.error(err);
    process.exit(1);
  }
};

start();
```

Once this thing is done, when we run the app using `node index`, our app will be running on port `5555`. But let's create the base route (`/` )for it.

```js
fastify.get('/', async (request, reply) => {
  reply.send({ hello: 'world' });
});
```

## Getting the random meme using Puppeteer

Here comes the fun part now! We'll open the web browser and get all the images from memedroid, and we'll do all of it through code. 

With the `puppeteer` package, Chromium also comes installed to scrape the web. That's why it might have taken time for you to get installed

> To skip Chromium download, you can use [`puppeteer-core`](http://npmjs.org/package/puppeteer-core) package and add the path to your Chrome file following the docs.

We'll create a function to **get all memes** and then we'll pick a random one in the route.

```js
async function getAllMemes() {
  const URL = 'https://www.memedroid.com/memes/tag/programming';

  const browser = await puppeteer.launch({ headless: true }); // launch browser
  const page = await browser.newPage(); // open a page

  await page.goto(URL); // go to the page
}
```

We simply launch the browser and open the page for memedroid in this code 👆.

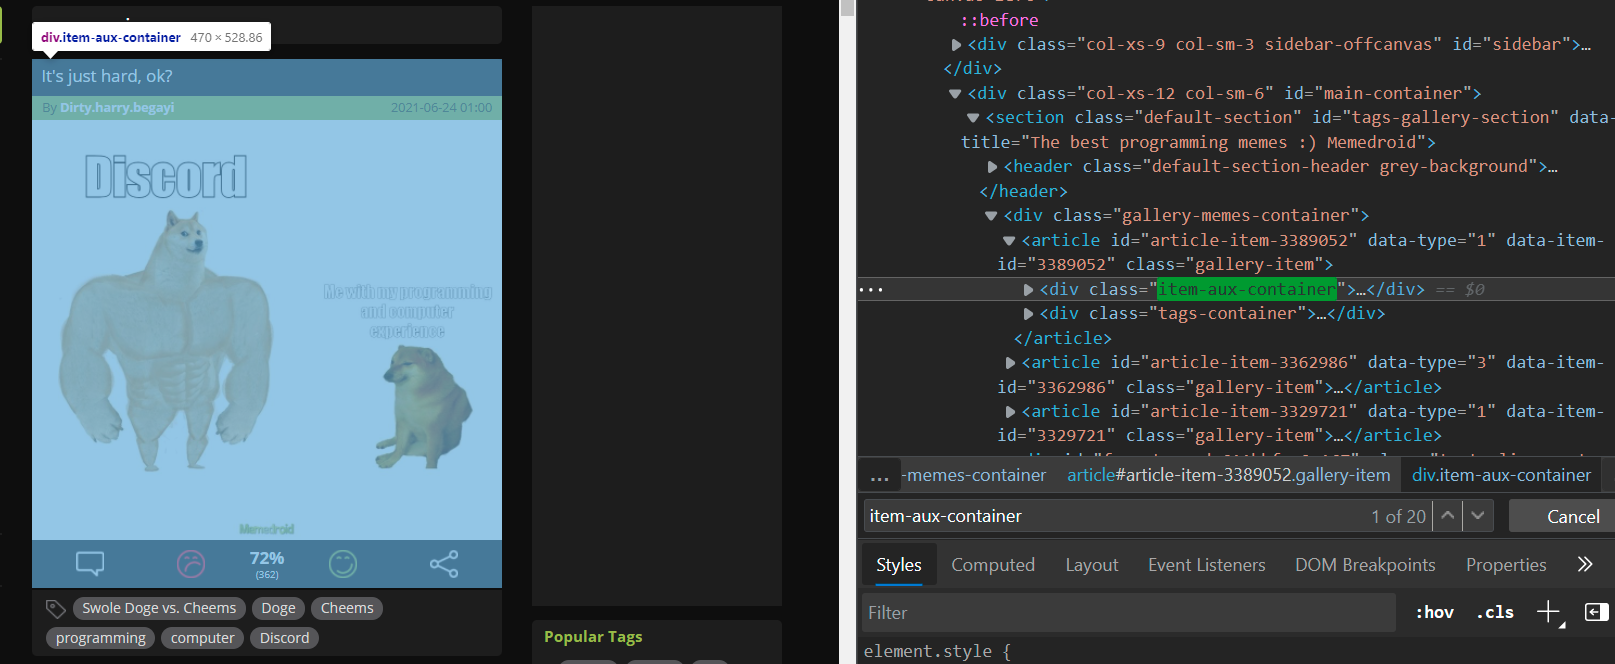
Now let's get all the `<img>` tags which are in the `<div>` with the class of `item-aux-container`. That's where all the memes live in.
![image.png](https://cdn.hashnode.com/res/hashnode/image/upload/v1629208607331/hMu6pVYP6h.png)

As in the above image, inside of each `<article>` tag, the div with that class exists, so we simply get it using the `$$eval` method on the `page`.

This method takes two arguments:
1. Selector
2. Callback function with the element(s)

```js
const allImages = await page.$$eval('div.item-aux-container img[src]', (imgs) => {});
```

We will map over the images in the callback function, and we'll return only the URL of the image from getting the `src` attribute. And this is how we do it.

We check if the `src` attribute starts with `http` and ends with `jpeg` and we return that if it does.

```js
const allImages = await page.$$eval('div.item-aux-container img[src]', imgs =>
  imgs.map(img => {
    if (
      img.getAttribute('src').startsWith('http') &&
      img.getAttribute('src').endsWith('jpeg')
    )
      return img.getAttribute('src');
  })
);
```

Unfortunately, that also returns to us `null` if that's not the case, so we filter out the nulls using the `.filter()` method.

```js
const imgs = allImages.filter(img => img !== null);
```

Once all that work is done, we close the browser and return the array of images, this is how the whole function looks like:

```js
async function getAllMemes() {
  const URL = 'https://www.memedroid.com/memes/tag/programming';

  const browser = await puppeteer.launch({ headless: true });
  const page = await browser.newPage();

  await page.goto(URL);

  const allImages = await page.$$eval('div.item-aux-container img[src]', imgs =>
    imgs.map(img => {
      if (
        img.getAttribute('src').startsWith('http') &&
        img.getAttribute('src').endsWith('jpeg')
      )
        return img.getAttribute('src');
    })
  );

  const imgs = allImages.filter(img => img !== null);
  
  // NEW LINES
  await browser.close();
  return imgs;
}
```

## Using Fastify to send the random meme

Finally, we will pick a random meme and send it to the user using this code

```js
fastify.get('/', async (request, reply) => {
  const memes = await getAllMemes();
  const randomNumber = Math.round(Math.random() * memes.length);
  reply.send({ memeUrl: memes[randomNumber] });
});
```

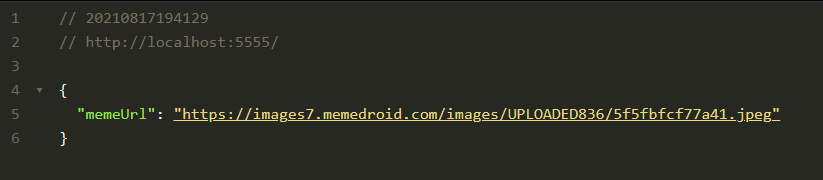
Now, whenever the user visits `localhost:5555`, they get this:
![image.png](https://cdn.hashnode.com/res/hashnode/image/upload/v1629209526927/q3deMvwlE.png)

![done.gif](https://media0.giphy.com/media/DRNHiOI54DlW3MBO30/200.gif)

We have our app done! Thanks for reading! You can find all the code  [here](https://github.com/max-programming/meme-api).

I hope you liked it! Comment down your thoughts! There is always room for improvement so let me know your suggestions on this project!

**Connect with me on my [YouTube channel](https://youtube.com/MaxProgramming) and my  [Twitter](https://twitter.com/maxprogramming1) 😉**

Until next time, keeping awesome ✌️